In the first post in the Minimum Viable Data Stack series, we set up a process to start using SQL to analyze CSV data. We set up a Postgres database instance on a Mac personal computer, uploaded a CSV file, and wrote a query to analyze the data in the CSV file.
That’s a good start! You could follow that pattern to do some interesting analysis on CSV files that wouldn’t fit in Excel or Google Sheets. But that pattern is slow and requires you to continually upload new data as new data becomes available.
This post will demonstrate how to connect directly to a data source so that you can automatically load data as it becomes available.
This process is called ETL, short for Extract, Transform, Load. Put simply, ETL just means, “connecting to a data source, structuring the data in a way that it can be stored in database tables, and loading it into those tables.” There’s a lot more to it if you really want to get into it, but for our purposes, this is all you’ll need to know right now.
For this part of the tutorial, we are going to use an open-source ETL tool called Airbyte to connect to Hubspot and load some Contact data into the same Postgres database we set up before. Then we’ll run a couple of analytical queries to whet your appetite!
Setting up an ETL Tool (Airbyte)
I chose Airbyte for this demo because it is open source which means it’s free to use as long as you have a computer or a server to run it on. Much of it is based on the open-source work of another ETL tool called Stitch had been pushing before they got acquired by Talend. That project was called Singer.
The best thing about Airbyte for our Minimum Viable Data Stack is that they make running the open-source code so easy because it is packaged in yet another software framework called Docker. Yes, if you’re keeping score at home, that means we are using one open-source framework packaged in another open-source framework packaged in yet another open-source framework. Oh, the beauty of open-source!
To keep this tutorial manageable, I am going to completely “hand wave” the Docker setup. Luckily, it’s easy to do. Since this tutorial is for Mac, follow the Docker installation instructions for Mac.
🎵 Interlude music plays as you install Docker 🎵
Once you’ve installed Docker, you can run the Docker app which will then allow you to run apps called “containers.” Think of a container as “all the code and dependencies an app needs, packaged so you can basically just click start” (Instead of having to load all the individual dependencies one by one!)
We’re only going to download and run one app on Docker: Airbyte!
Note: If you need help on the next few steps, Airbyte has a Slack community that is really helpful.
To download Airbyte the instructions are simple. Just open up your terminal (you can find this by using Mac’s spotlight search [cmd+space] and typing in “Terminal”). In the terminal just paste in the following three commands:
git clone https://github.com/airbytehq/airbyte.git
cd airbyte
docker-compose up
The commands tell your computer to copy all the code from their Github repository to your computer into a folder called “airbyte”, then “cd” aka “changing the directory” to the “airbyte” directory, then tell Docker to run the Airbyte app container.
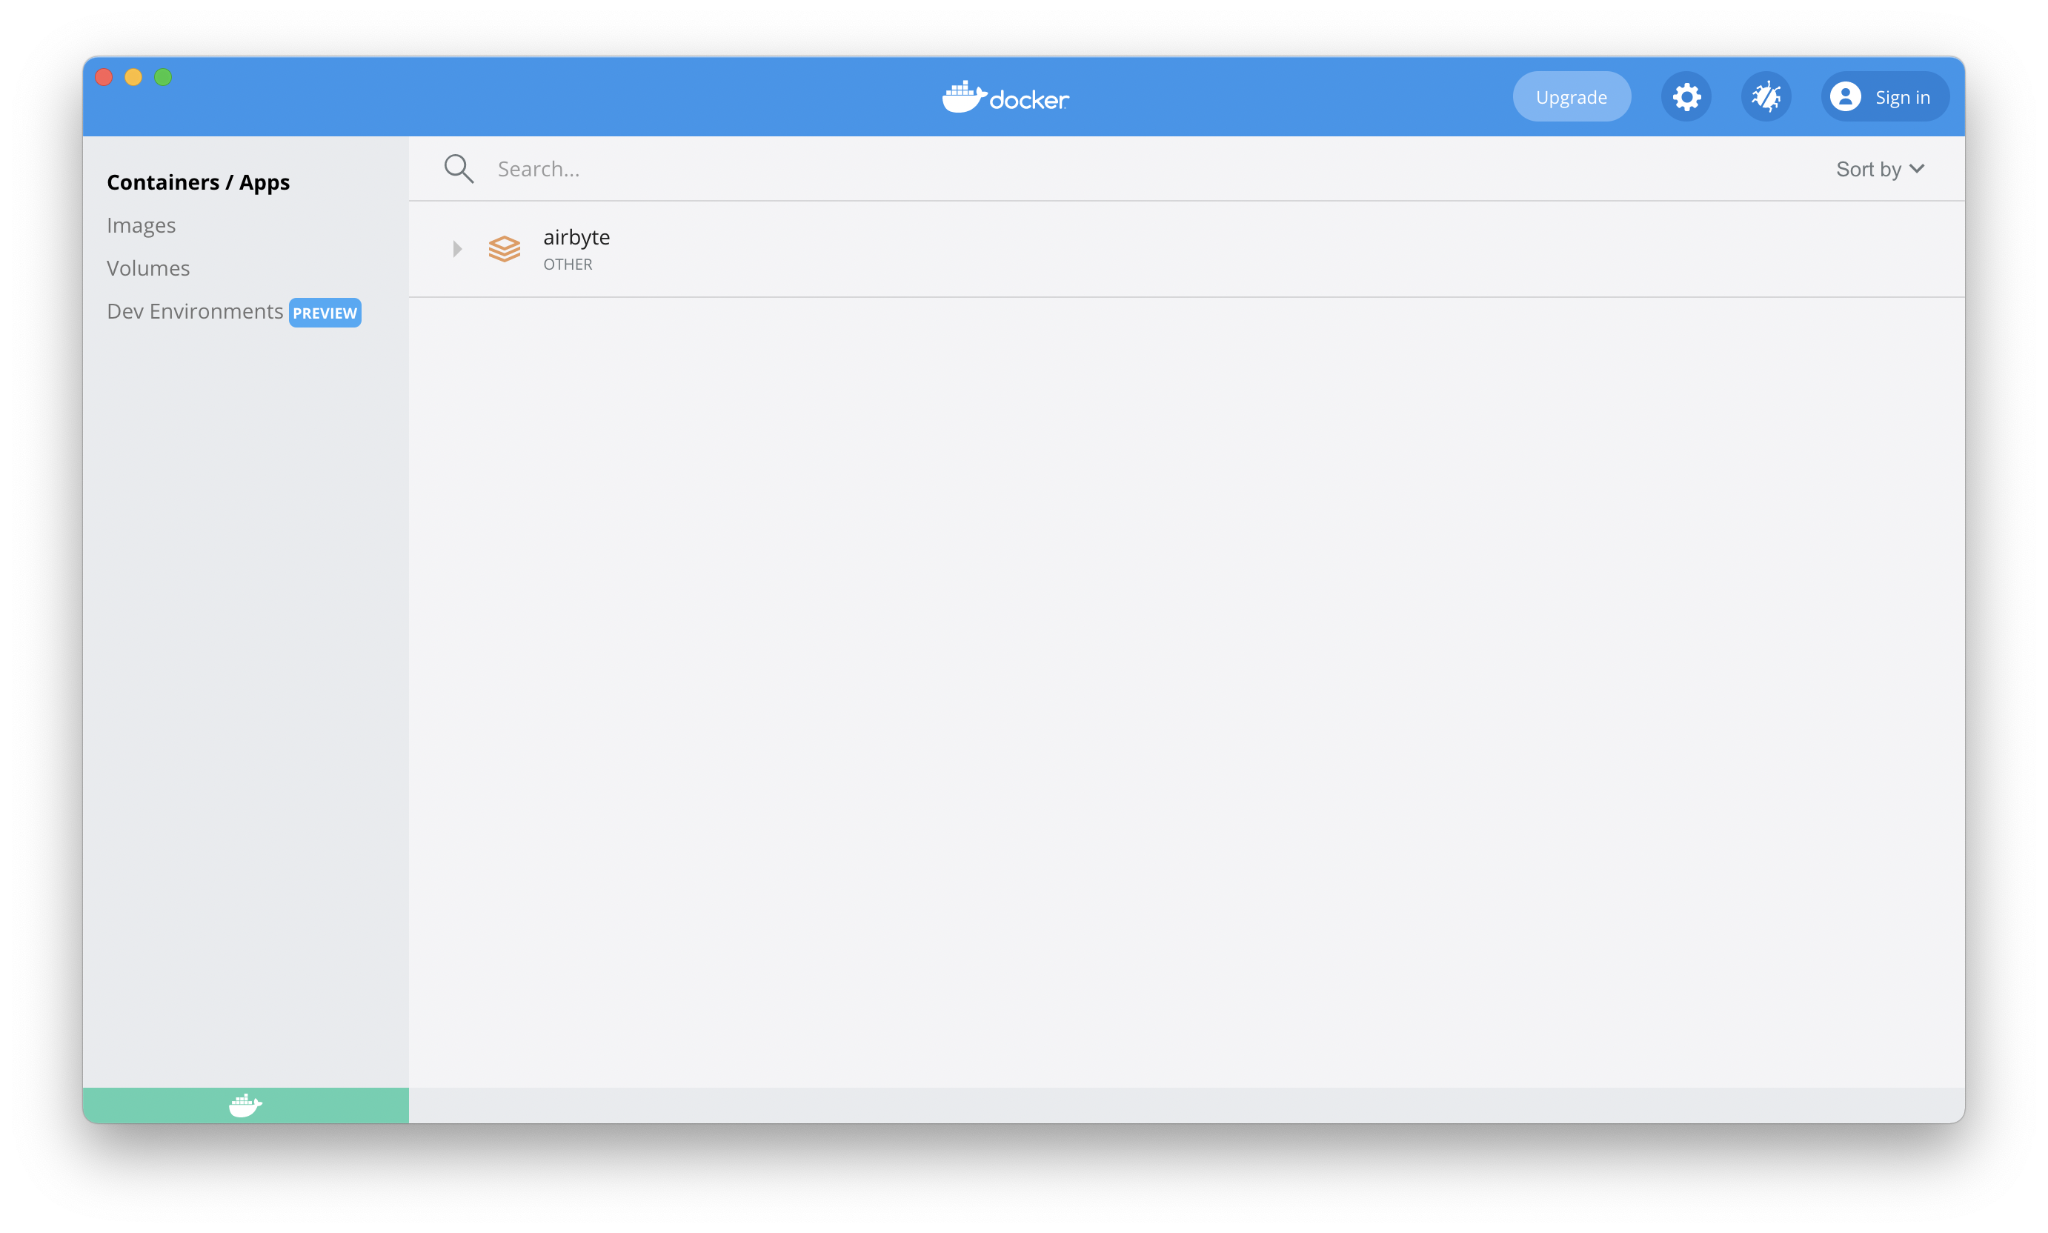
The beauty of this is that once you run this the first time from the command line, you can start Airbyte from the Docker UI by just clicking the “play” button.
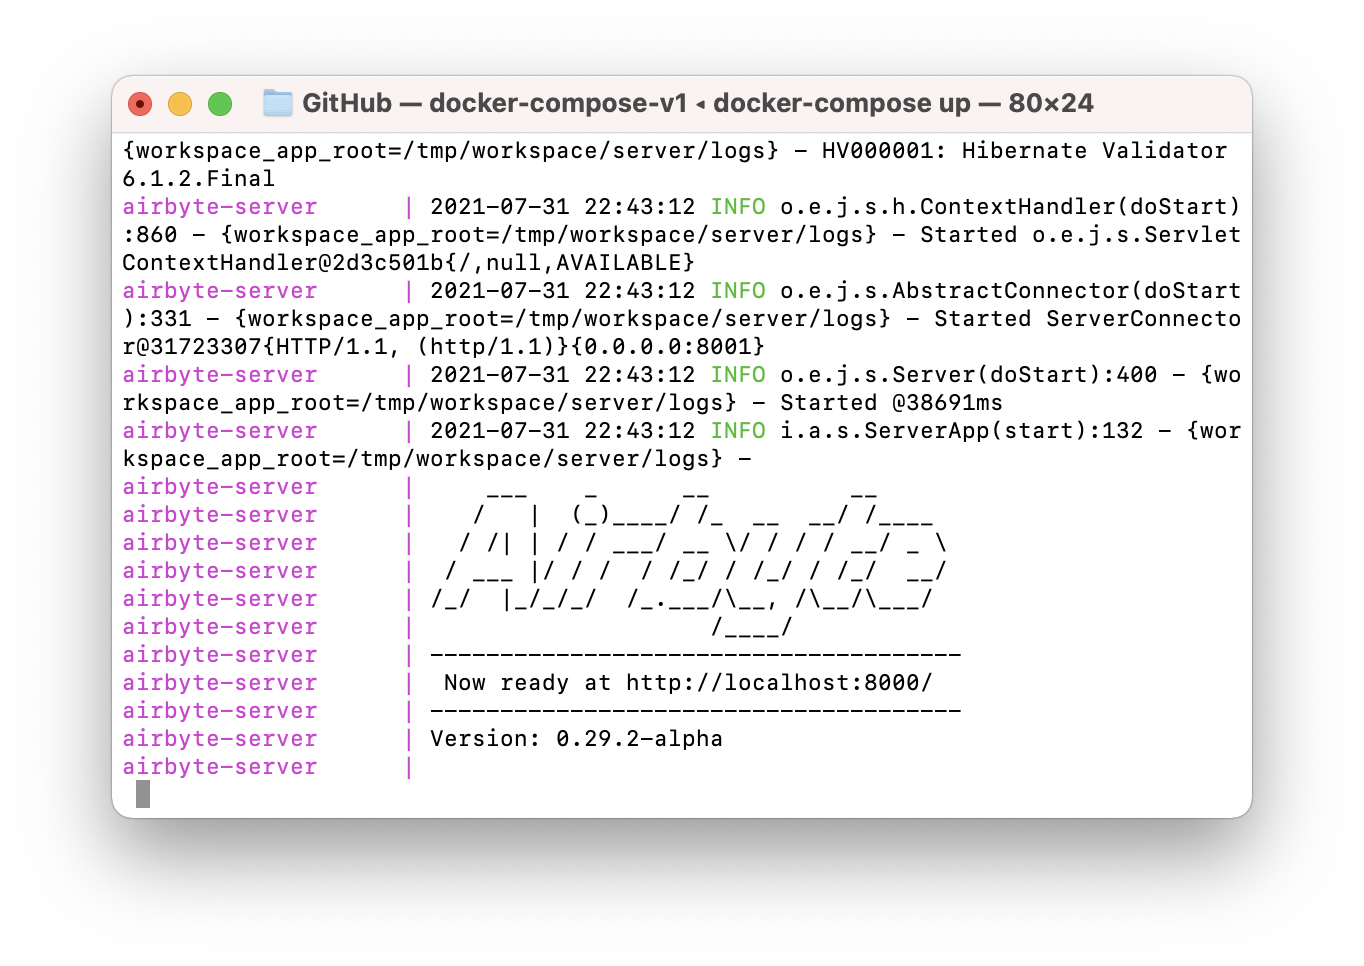
Airbyte will do a bit of setup and then your terminal will display the text shown above. At that point Airbyte is running on your computer and to use it, all you have to do is open your browser and go to http://localhost:8000.
If you’re wondering how this works, Airbyte is running a webserver to provide a web interface to interact with the code that does all the heavy-ETL-lifting. If this were a common ETL tool like Stitch or Fivetran, the webserver and the ETL processes would run on an actual server instead of your personal computer.
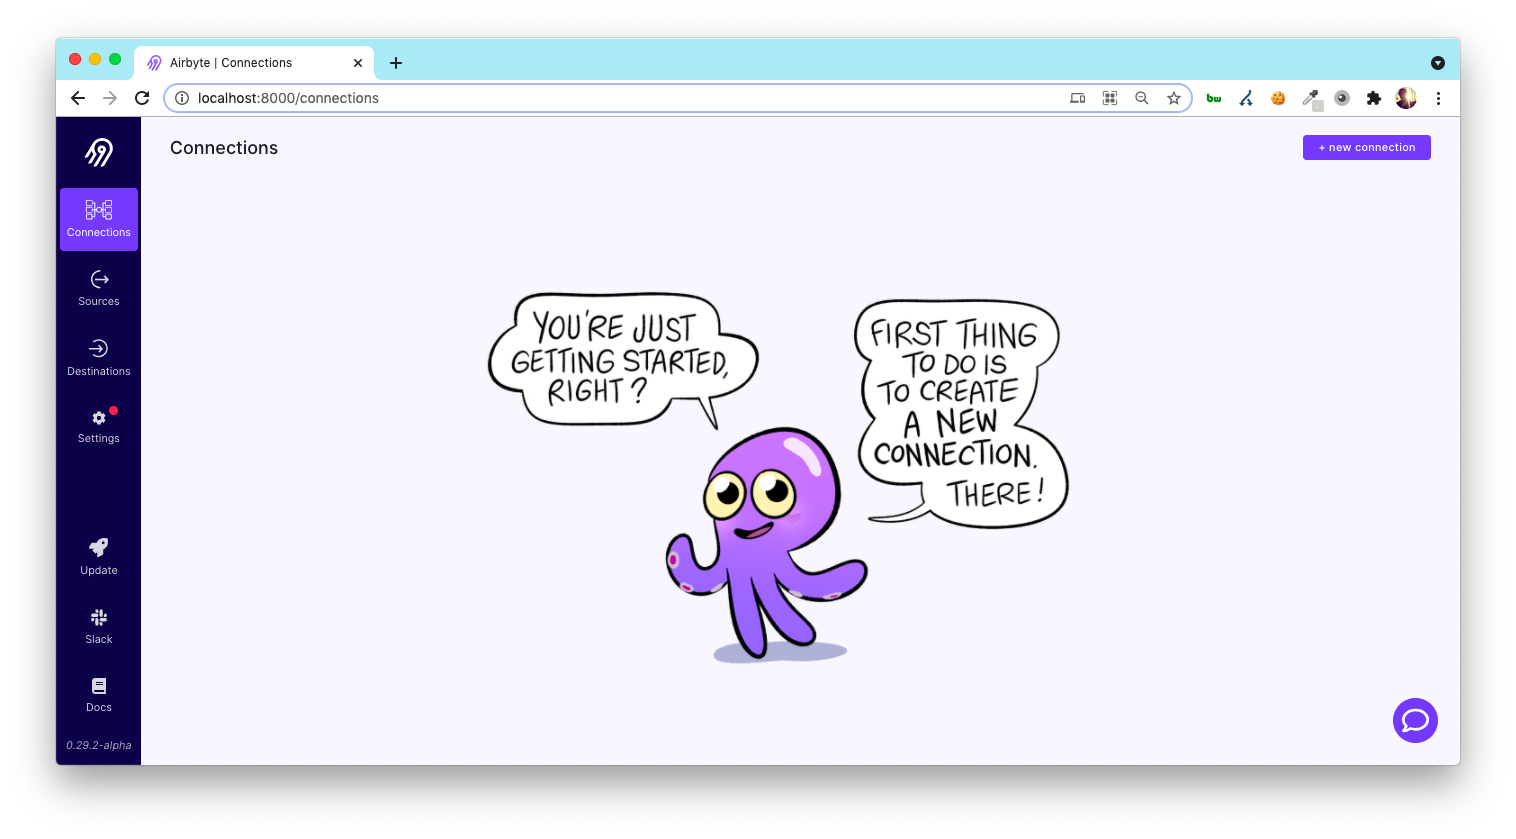
If everything has gone according to plan you can go to http://localhost:8000 and see the Airbyte app UI running and ready to start ETL-ing!

Setting up your first ETL job (Hubspot to Postgres)
I’ll admit, that last part got a little gruesome but don’t worry, it gets easier from here (as long as everything goes according to plan…)
From here we have to connect both our database and data sources to Airbyte so it has access to the source data and permission to write to the database.
I’ve chosen to load data from Hubspot because it is really easy to connect and because it shows the ups and downs of ETL… And of course, we’re still using Postgres.
Creating a Postgres Destination
All you have to do is paste in your database credentials from Postgres.app. Here are Airbyte’s instructions for connecting to Postgres.
These are the same ODBC credentials we used to connect Postico in the last article. You can find them on the Postico home screen by clicking your database name. Note
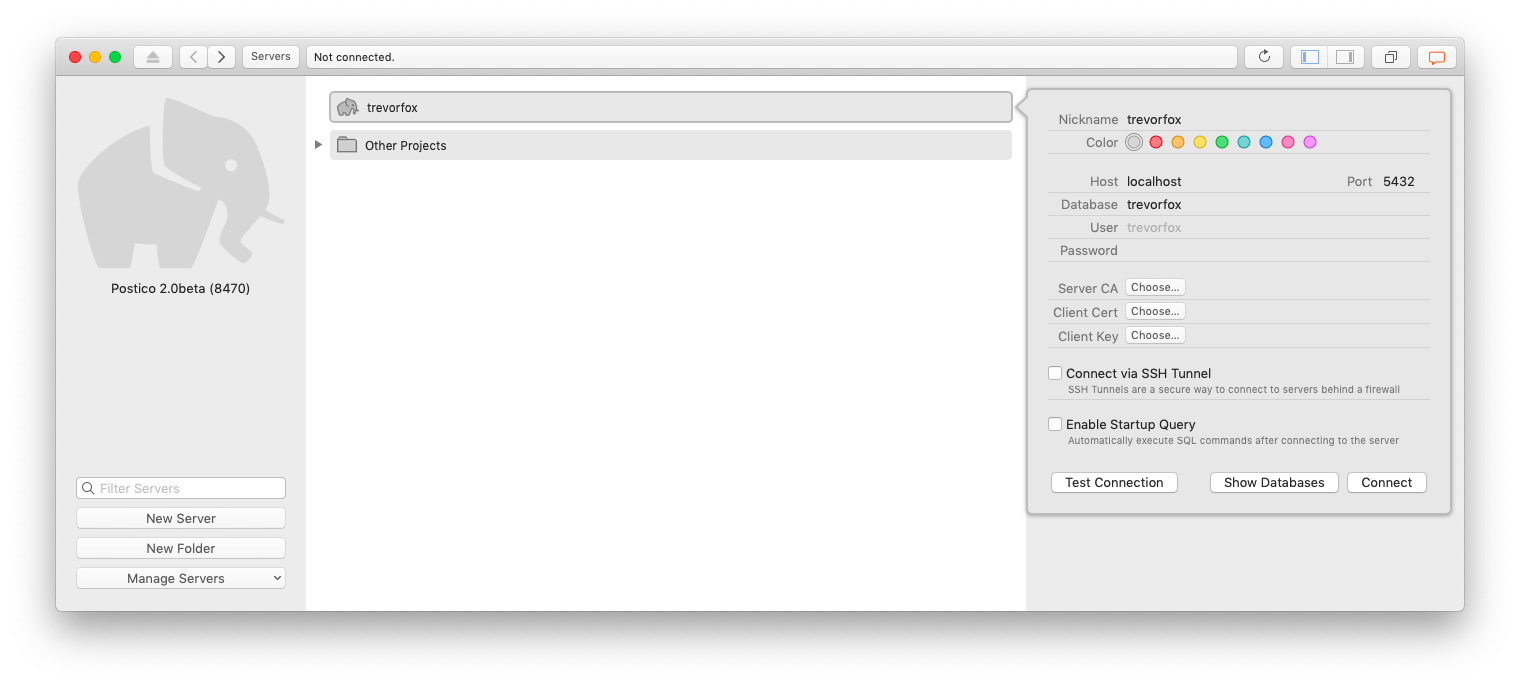
In my case, these are the settings:
- Name: I called it “Postgres.app” but it could be anything you want
- Host: Use host.docker.internal (localhost doesn’t work with Docker. See instruction above)
- Port: 5432
- Database Name: Mine is “trevorfox.” That’s the name of my default Postgres.app database
- Schema: I left it as “public.” You might want to use schemas for organizational purposes. Schemas are “namespaces” and you can think of them as folders for your tables.
- User: Again, mine is “trevorfox” because that is my default from when I set up Postgres.app
- Password: You can leave this blank unless you set up a password on in Postgres.app
From there you can test your connection and you should see a message that says, “All connection tests passed!”
Creating a Hubspot Source
You’ll first need to retrieve your API key. Once you’ve got it, you can create a new Hubspot Source in Airbyte.
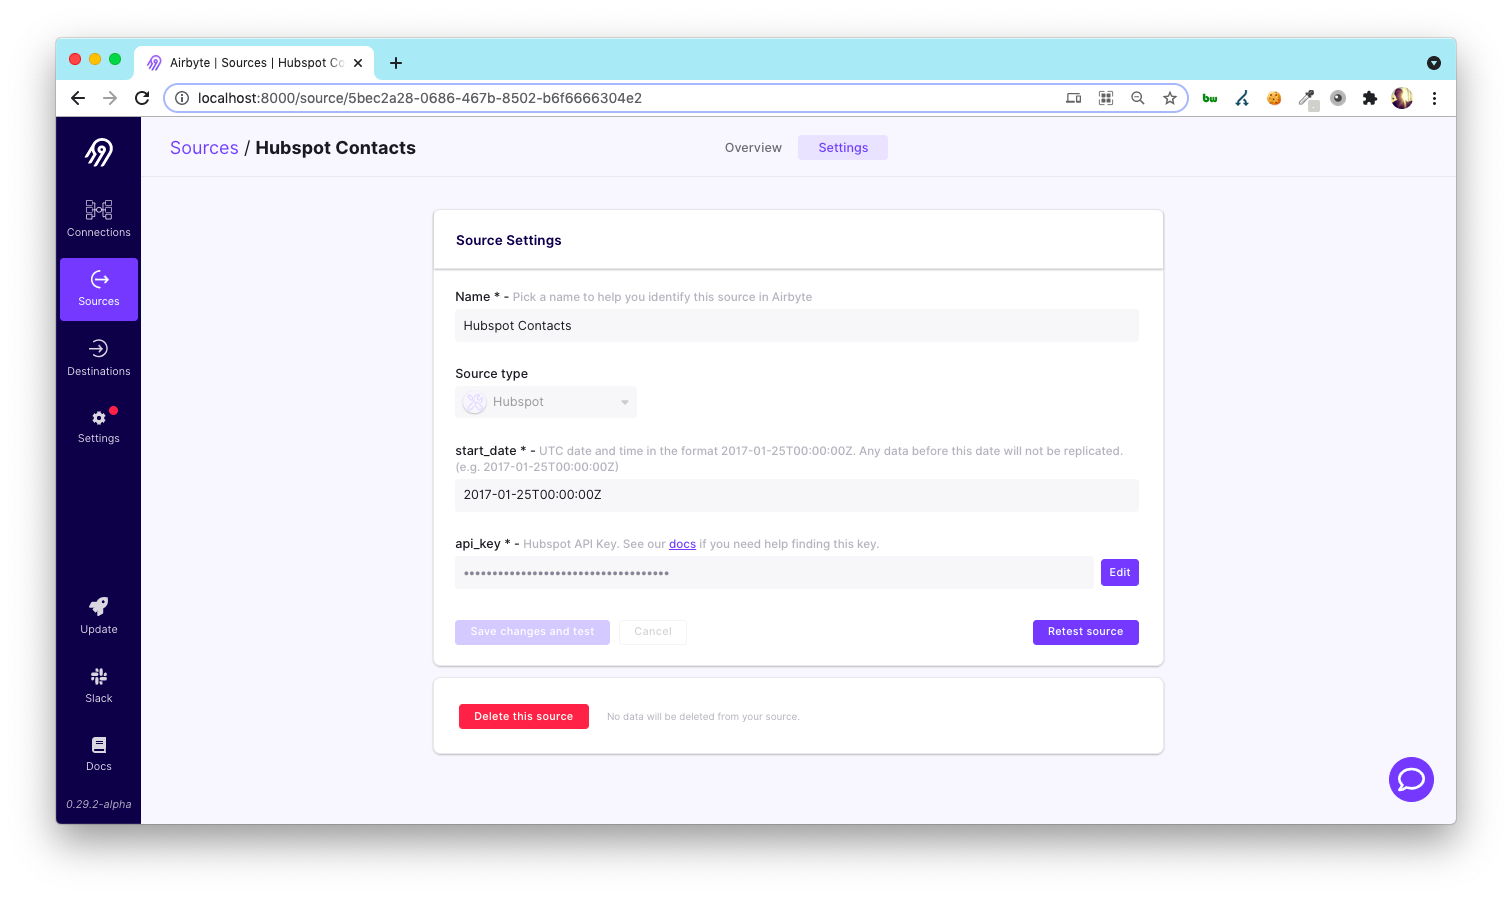
I used these settings:
- Name: Hubspot
- Source type: Hubspot
- API Key: My Hubspot API key
- start_date: I used 2017-01-25T00:00:00Z which is the machine-readable timestamp for 1/1/2017
Here’s a cute picture to celebrate getting this far!
Creating the ETL Connection
Since we’ve already created a Destination and a Source, all we have to do is to tell Airbyte we want to extract from the Source and load data to the Destination.
Go back to the Destinations screen and open your Postgres.app source, click “add source,” and choose your source. For me, this is the source I created called “Hubspot.”
Airbyte will then go and test both the Source and Destination. Once both tests succeed, you can set up your sync.
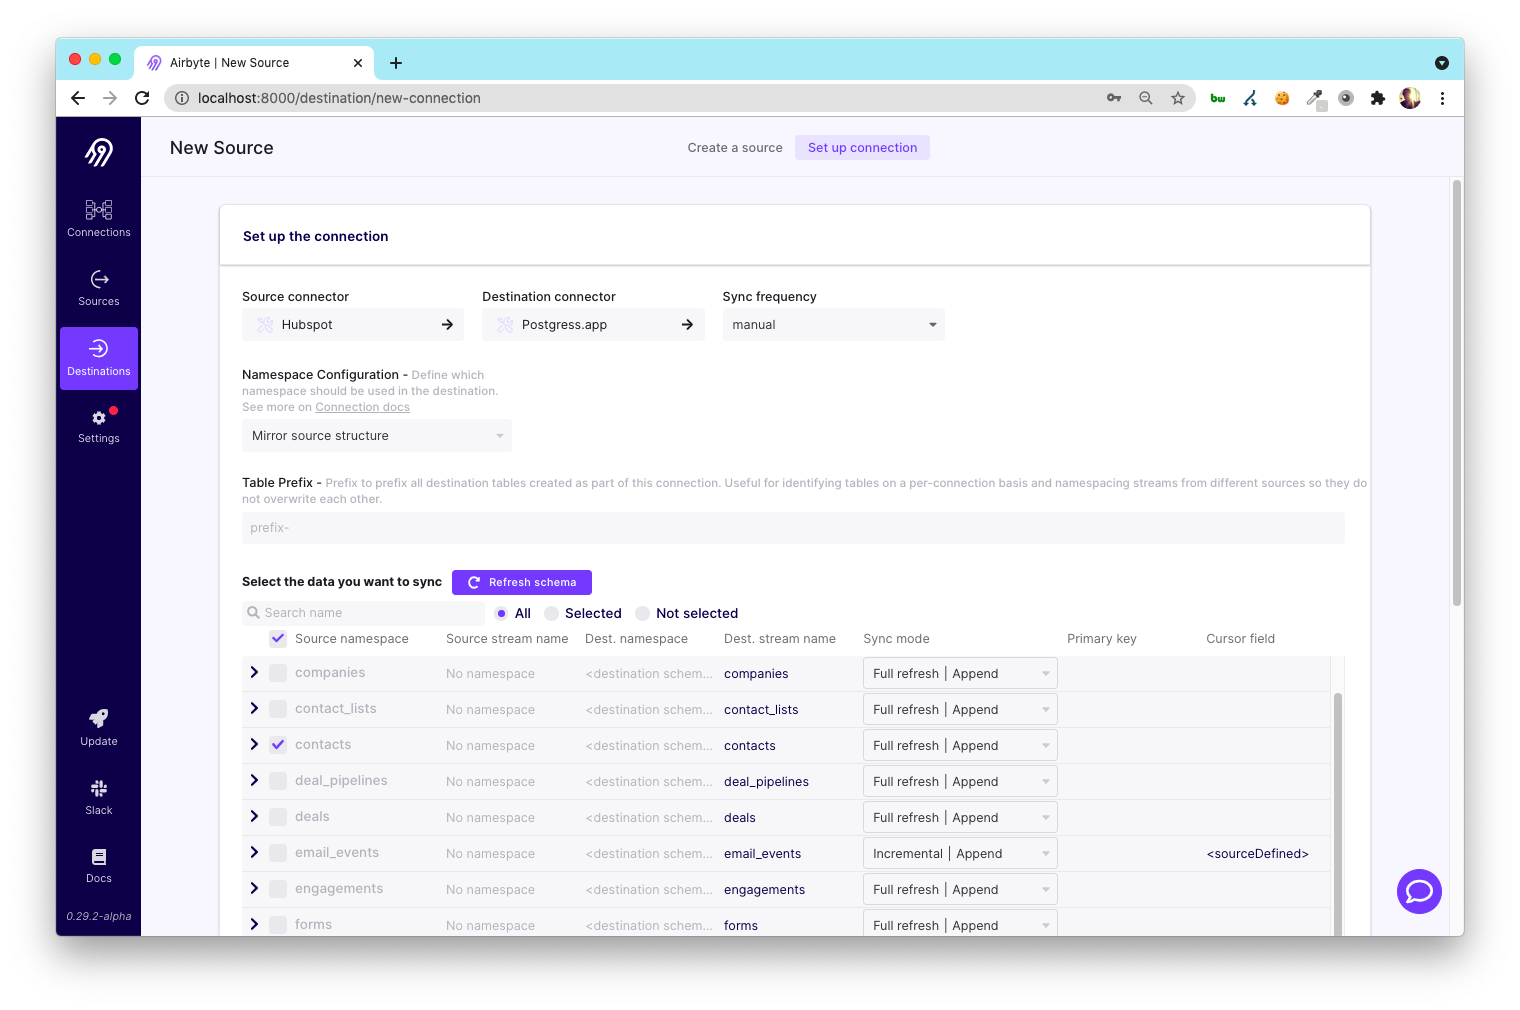
There are a lot of settings! Luckily you can leave most of them as they are until you want to get more specific about how you store and organize your data.
For now, set the Sync frequency to “manual,” and uncheck every Hubspot object besides Contacts.
In the future, you could choose to load more objects for more sophisticated analysis but starting with Contacts is good because it will be a lot faster to complete the first load and the analyses will still be pretty interesting.
Click the “Set up connection” button at the bottom of the screen.
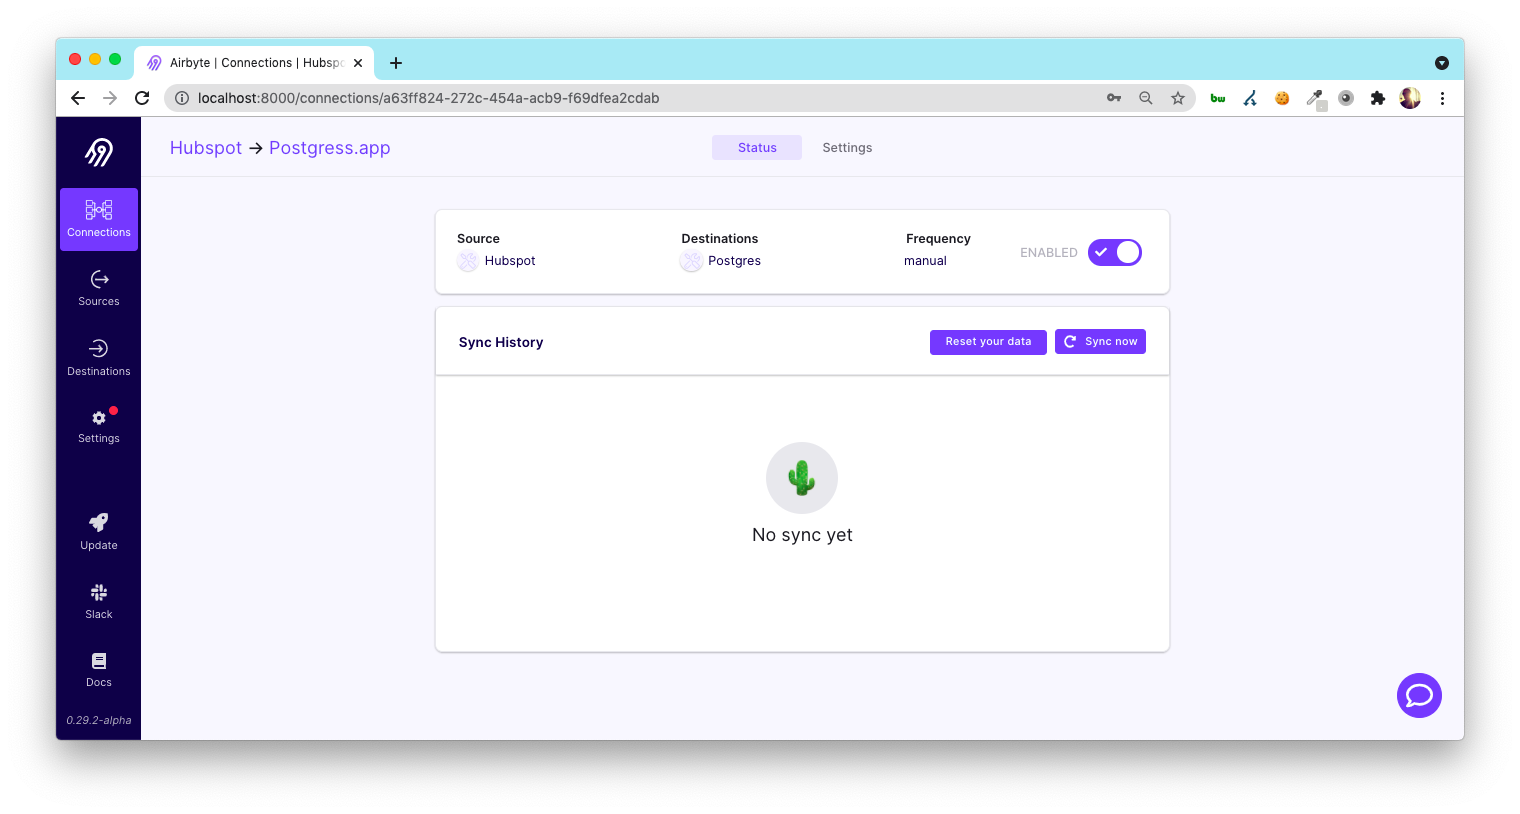
You’ve created your first Connection! Click “Sync now” and start the ETL job!
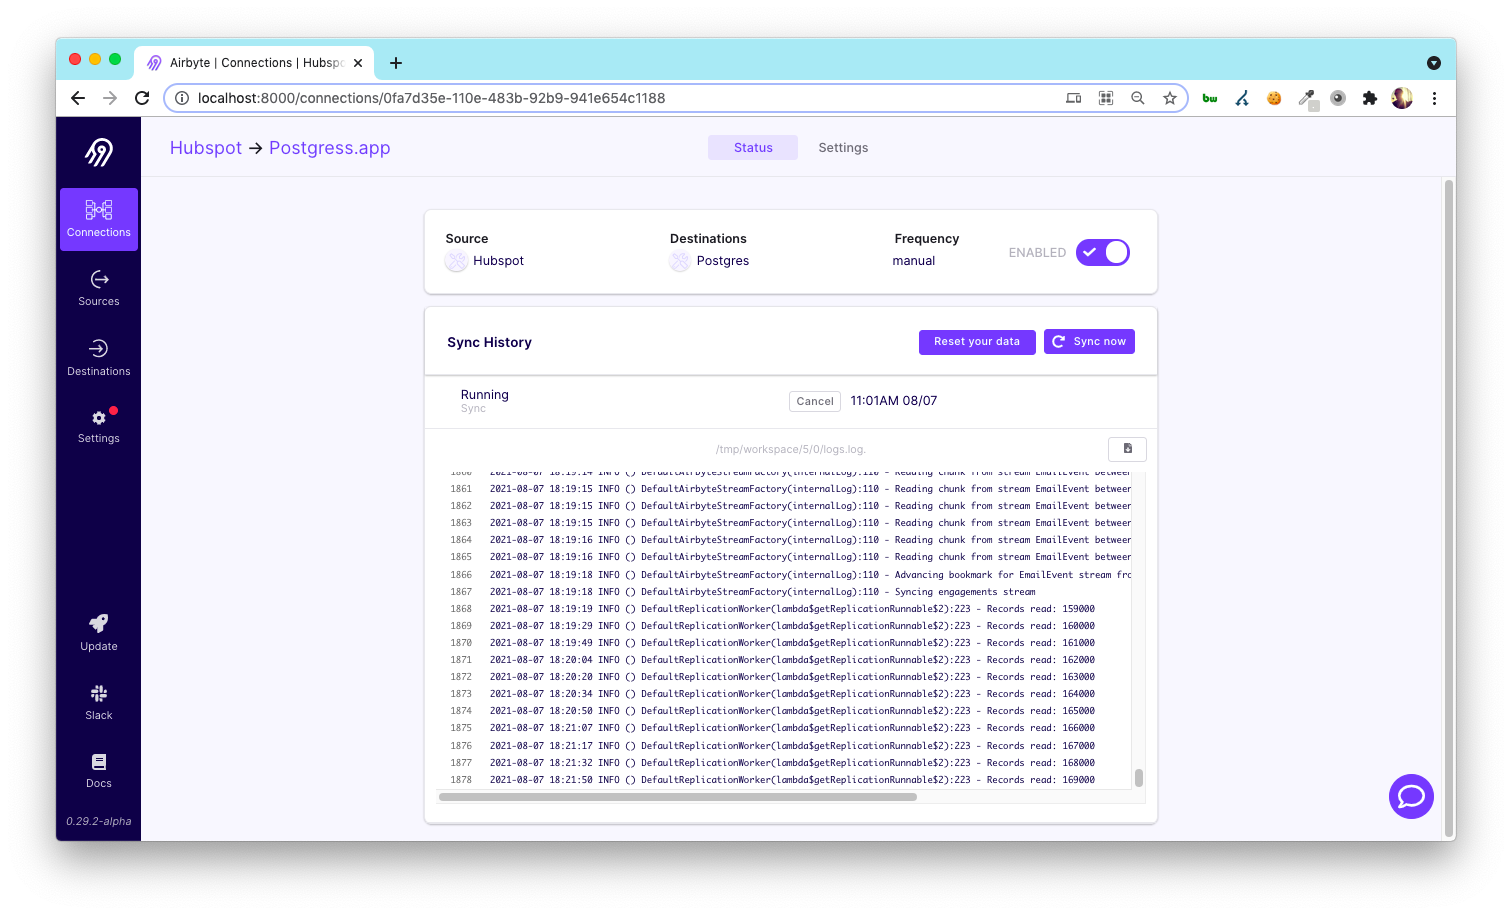
As the sync runs, you’ll see lots of logs. If you look carefully, you’ll see some that read “… Records read: 3000” etc. which will give you a sense of the progress of the sync.
What’s happening in Postgres now?
Airbyte is creating temporary tables and loading all the data into those. It will then copy that data into its final-state tables. Those tables will be structured in a way that is a bit easier to analyze. This is some more of the T and L of the ETL process!
As the sync is running, you can go back to Postico and refresh the table list (cmd+R) to see new tables as they are generated.
Let’s look at the data!
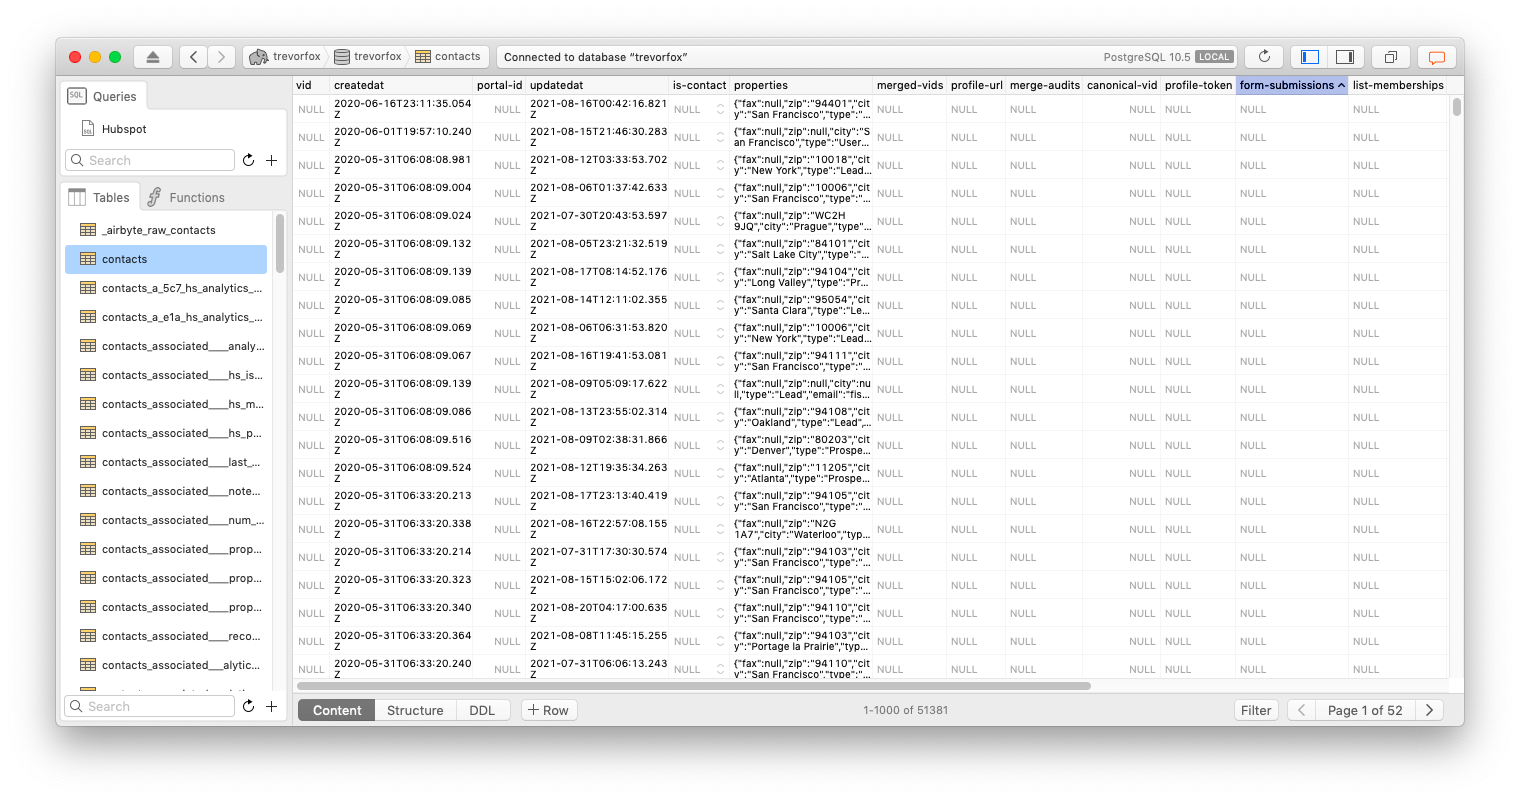
When the job completes, you’ll notice that Airbyte has created a lot of tables in the database. There is a “contacts” table, but there are a lot of others prefixed with “contacts_.”
Why so many tables?
These are all residue from taking data from a JSON REST API and turning it all into tables. JSON is a really flexible way to organize data. Tables are not. So in order to get all that nested JSON data to fit nicely into tables, you end up with lots of tables to represent all the nesting. The Contacts API resource alone generated 124 “contacts_” tables. See for yourself:
select count(tablename)
from pg_tables t
where t.tablename like 'contacts_%'This query queries the Postgres system table called pg_tables which, as you probably guessed, contains a row for each table with some metadata. By counting the tables that match the prefix “contacts_,” you’ll see all the tables that come from the Contacts resource.
Why you care about Data Modeling and ELT
In order to structure this data in a way that is more suitable for analysis, you’ll have to join the tables together and select columns you want to keep. That cleaning process plus other business logic and filtering is called data modeling.
Recently it has become more common to model your data with SQL once it’s in the database (rather than right after it is extracted and before it’s loaded into the database). This gave rise to the term ELT to clarify that most of the transformations are happening after the data has landed in the database. There is a lot to discuss here. I might have to double back on this at some point…
Luckily, we can ignore the majority of these tables. We are going to focus on the “contacts” table.
Analyzing the Data
Let’s first inspect the data and get a feel for what it looks like. It’s good to start with a sanity check to make sure that all your contacts are in there. This query will tell you how many of the contacts made it into the database. That should match what you see in the Hubspot app.
select count(*)
from contacts
One of the first questions you’ll probably have is how are my contacts growing over time? This is a good query to demonstrate a few things: the imperfect way that ETL tools write data into tables, the importance of data modeling, and ELT in action.
In the screenshot above, you’ll notice that the “contacts” table has a bunch of columns, but one of them is full of lots of data. The “properties” column represents a nested object within the Hubspot Contacts API response. That object has all the interesting properties about a Contact, like when it was created, what country they are from, and other data a business might store about their Contacts in Hubspot.
Airbyte, by default, dumps the whole object into Postgres as a JSON field. This means you have to get crafty in order to destructure the data into columns. Here’s how you would get a Contact’s id, the data it was created. (This would be the first step towards contact count over time)
select c.properties->>'hs_object_id' id,
	c.createdat::date
from contacts c
limit 10;
Notice the field, “c.properties->>’hs_object_id’.“ The “->>” is how you get a JSON object field from the JSON-typed fields.
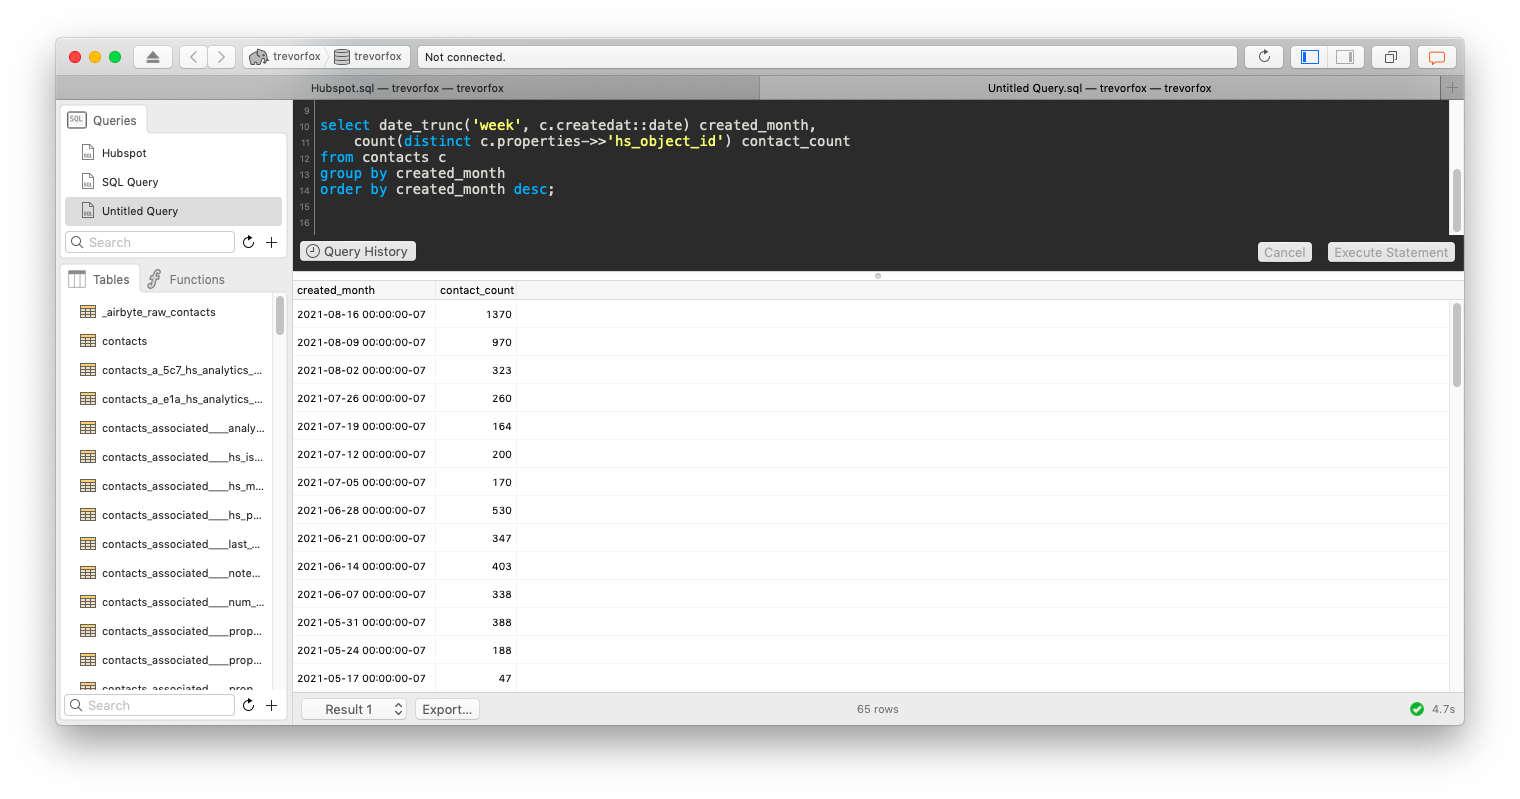
To count new contacts by month, we can add a little aggregation to the query above.
select date_trunc('week', c.createdat::date) created_month,
	count(distinct c.properties->>'hs_object_id')  contact_count
from contacts c
group by created_month
order by created_month desc;
THIS IS IT! This is the beauty of analytics with a proper analytics stack. Tomorrow, the next day, and every day in the future, you can run the Hubspot sync and see up-to-date metrics in this report!
You’ll learn that the more queries you run, the more you’ll get tired of cleaning and formatting the data. And that, my friends, is why data modeling and ELT!
I changed to dark mode since the last post :]
Looking Forward
At this point, the stack is pretty viable. We have a Postgres database (our data warehouse), an ETL process that will keep our data in sync with the data in the source systems (Airbyte), and the tools for analyzing this data (SQL and Postico). Now you can answer any question you might have about your Hubspot data at whatever frequency you like—and you’ll never have to touch a spreadsheet!
The foundation is set, but there is still more inspiration ahead. The natural place to go from here is a deeper dive into analysis and visualization.
In the next post, we’ll set up Metabase to visualize the Hubspot data and create a simple dashboard based on some SQL queries. From there, I imagine we’ll head towards reverse ETL and push the analysis back to Hubspot. =]
I hope this was interesting, at the least, and helpful if you’re brave enough to follow along. Let me know in the comments if you got hung up or if there are instructions I should add.

Pingback: Google Search Console Bulk Export for BigQuery: The Complete Guide • Trevor Fox
Pingback: How does Dataform work? A primer on the ref function • Trevor Fox